- November 12, 2024
- in HVAC
- by Kyle Stewart
Welcome to our comprehensive DIY guide on duct boot repair! Whether you’re a seasoned DIY enthusiast or a beginner looking to tackle your home’s HVAC system issues, this guide is for you. Duct boots play a crucial role in ensuring efficient air distribution throughout your home, directly impacting your comfort and energy bills.
Over time, these components may require repairs due to wear and tear, air leaks, or visible damage. Fear not! With the right tools and a bit of know-how, you can easily repair your duct boot, enhancing your home’s energy efficiency and indoor air quality.
From identifying signs of damage to the step-by-step repair process, we’ve got you covered. Plus, we’ll share tips for successful repairs and advise when it might be time to call in a professional. Ready to get started?
Let’s dive into the world of duct boot repair and keep your HVAC system running smoothly.
What is a duct boot?
A duct boot serves as a critical component in heating, ventilation, and air conditioning (HVAC) systems, acting as the interface between the ductwork and the room. It is essentially a connector, usually made from materials such as galvanized steel, aluminum, or rigid fiberglass, that facilitates the transition of air between the duct system and the interior spaces of a building. Positioned at the end of duct runs, duct boots are designed to fit into floor, wall, or ceiling openings, where they direct airflow efficiently into a room.
Their design varies to accommodate different types of vents and grilles, ensuring a seamless integration into the architectural elements of a space. The typical lifespan of a duct boot can range from 10 to 20 years, depending on the material used and the conditions within the duct system, such as humidity levels and exposure to corrosive substances. Understanding the role of a duct boot is essential for anyone looking to maintain or enhance their HVAC system’s efficiency, as it directly impacts air distribution and comfort levels within a building.
Why repair a duct boot?
Repairing a duct boot is crucial for maintaining the efficiency and quality of your home’s air conditioning and heating system. A well-functioning duct boot helps improve energy efficiency by ensuring that air flows directly into the intended spaces without leakage, which can lead to unnecessary energy consumption and increased utility bills. For instance, sealing leaks in ductwork can improve system efficiency by up to 20%, according to the U.S.
Department of Energy. This translates to significant savings on your energy bills over time. Additionally, repairing a duct boot can significantly enhance indoor air quality by preventing dust, debris, and other pollutants from entering the duct system and circulating throughout your home.
Studies have shown that indoor air pollutants can be 2 to 5 times higher than outdoor levels, making it imperative to maintain clean ductwork for health reasons. By addressing issues with your duct boot promptly, you can ensure a comfortable, healthy, and cost-effective living environment.
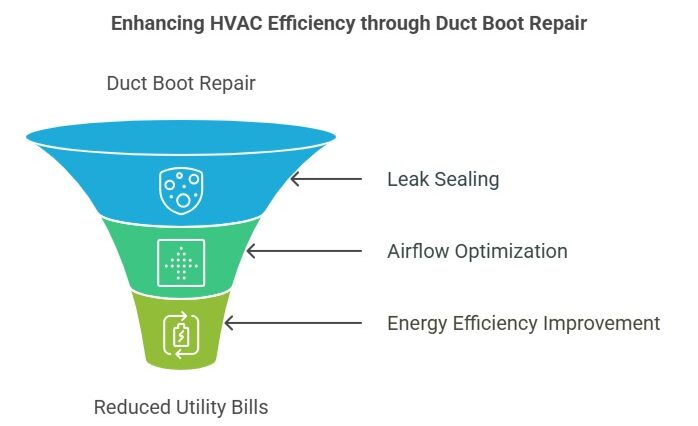
Improve energy efficiency
Repairing a duct boot can lead to significant energy savings. When air leaks are sealed, your HVAC system doesn’t have to work as hard to maintain the desired temperature, reducing energy consumption and lowering utility bills. For example, homeowners might see a reduction of 10-30% in their energy bills after ensuring their ductwork is properly sealed and insulated.
Enhance indoor air quality
Fixing a damaged duct boot helps block the entry of pollutants, such as dust and mold, into your HVAC system. This prevents these contaminants from being circulated throughout your home, ensuring the air you breathe is cleaner and healthier. Improved indoor air quality can lead to fewer health issues related to allergies and respiratory problems, providing a safer environment for you and your family.
Signs your duct boot needs repair
Identifying the need for duct boot repair is key to maintaining your HVAC system’s efficiency and indoor air quality. Air leakage is a primary indicator, suggesting that conditioned air is escaping, leading to increased energy usage and costs. Unusual noises, such as whistling or rattling, can signal loose or damaged duct boots, impacting system performance.
Visible damage, including cracks, holes, or corrosion, directly affects the integrity of the ductwork, necessitating immediate attention to prevent further issues. Recognizing these signs early can save time, money, and ensure a comfortable indoor environment.
| Sign | Description | What to Look For | Potential Impact |
| Air Leakage | Conditioned air escaping from ductwork. | Increased energy bills, rooms not reaching desired temperature, drafts near vents. | Increased energy consumption and costs. |
| Unusual Noises | Sounds indicating loose or damaged duct boots. | Whistling, rattling, or banging sounds near vents, especially when the HVAC system is running. | Indicates potential damage or loosening of the duct boot, affecting system performance. |
| Visible Damage | Physical damage to the duct boot. | Cracks larger than 1/16 inch, holes, signs of corrosion, or any physical deformities on the duct boot. | Compromises the duct system’s integrity, leading to inefficient air distribution and potential contamination of indoor air. |
Air leakage
Air leakage is a telltale sign that your duct boot may need repairs. It indicates that conditioned air is escaping, which can lead to increased energy bills and reduced system efficiency.
Unusual noises
Hearing unusual noises like whistling or rattling from the area of the duct boot suggests it might be loose or damaged. These sounds are often the result of air passing through gaps or holes.
Visible damage
Visible damage to the duct boot, such as cracks, holes, or signs of corrosion, is a clear indicator that repair is necessary. Such damage compromises the duct system’s integrity and its ability to properly condition your space.
Tools and materials needed
For successful duct boot repair, having the right tools and materials is essential. A screwdriver is needed to tighten or remove screws securing the duct boot. Foil tape is used for sealing minor leaks and ensuring airtight connections.
For larger repairs, mastic sealant provides a durable fix, especially when used in conjunction with mesh fabric to reinforce the area. Lastly, gloves are recommended for safety, protecting your hands during the repair process. Equipped with these items, homeowners can effectively address common duct boot issues, enhancing their HVAC system’s performance and efficiency.
Here’s a detailed table of the tools and materials needed, including brand recommendations and specifics:
| Tool/Material | Purpose | Specifics/Recommendations |
| Screwdriver | To tighten or remove screws securing the duct boot. | A multi-bit screwdriver set is recommended for versatility. Brands like Klein Tools, DeWalt, or Stanley provide durable options that can accommodate various screw types and sizes. |
| Foil Tape | For sealing minor leaks in duct boots. | Look for UL 181-rated foil tape for high durability and heat resistance. 3M and Nashua are reputable brands offering tapes that provide excellent adhesion and are suitable for a wide range of temperatures. |
| Mastic Sealant | Used to fill gaps and holes for larger repairs. | Choose water-based mastic sealant for ease of use and cleanup. Hardcast Versa-Grip 181 is a popular choice among professionals for its strong, flexible seal. Ductmate and Master Flow also offer reliable options. |
| Mesh Fabric | Reinforces the area where mastic sealant is applied. | Fiberglass mesh fabric is recommended for its strength and compatibility with mastic sealants. The Saint-Gobain Adfors Fiberglass Mesh Tape is an excellent choice for ensuring a durable repair. |
| Gloves for safety | Protects your hands during the repair process. | Nitrile or latex gloves are suitable for protection against dust and chemicals. Mechanix Wear offers a range of gloves that provide both durability and dexterity, which is beneficial when handling small parts and tools. |
| Inspection Tools | Tools needed for the inspection phase to identify cracks and holes. | A flashlight and a mirror on a telescoping handle can help inspect hard-to-see areas. The GearLight LED Tactical Flashlight is highly recommended for its brightness and durability. Inspection mirrors are available from Ullman Devices. |
Equipped with these specific tools and materials, homeowners can effectively address common duct boot issues, enhancing their HVAC system’s performance and efficiency.
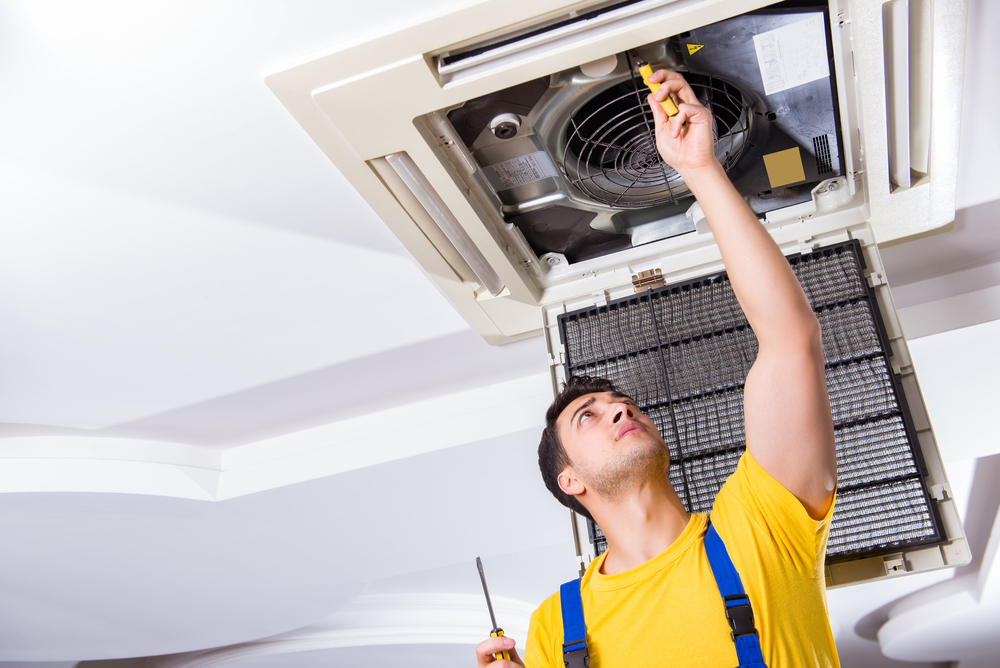
Steps to repair a duct boot
Repairing a duct boot involves a systematic approach to ensure a durable and effective fix. Initially, inspect the duct boot for any cracks, holes, or signs of wear. This step is crucial for determining the extent of the damage.
Next, clean the area thoroughly to remove any dust, debris, or contaminants that could affect the adhesion of repair materials. For minor repairs, apply foil tape to seal leaks and ensure an airtight connection. In cases of larger damage, use mastic sealant over the affected area, reinforced with mesh fabric for added strength.
Secure the duct boot back into place, tightening screws or straps as necessary. Finally, test for leaks using smoke or a hand test to verify the repair’s success. Following these steps can restore the functionality of your HVAC system, improving energy efficiency and indoor air quality.
Inspect the duct boot
Look for cracks and holes
Start by examining the duct boot closely to identify any signs of damage, such as cracks or holes, which could compromise the system’s efficiency. Use a flashlight for better visibility in dark areas.
Clean the area
Remove dust and debris
Ensure the repair area is clean by removing any dust, debris, or contaminants. Use a brush or vacuum for effective cleaning. A clean surface is critical for the adhesion of repair materials.
Apply foil tape for minor repairs
Overlap edges for a better seal
For small leaks, use foil tape to seal the area. Make sure to overlap the tape edges by at least one inch to create an airtight seal. Press down firmly on the tape to remove any air bubbles.
Use mastic sealant for larger repairs
Apply a thick layer over the mesh fabric
In cases of significant damage, apply a thick layer of mastic sealant over the area, using mesh fabric as reinforcement for a durable repair. Ensure the mesh fabric is fully covered by the sealant for optimal strength.
Secure the duct boot
Tighten screws or straps
Reattach and secure the duct boot firmly in place by tightening screws or straps, ensuring it is properly aligned and stable. Check for any movement and adjust as necessary.
Test for leaks
Use smoke or a hand test
After the repair, conduct a leak test using smoke from a smoke pen or a simple hand test (feeling for drafts) to ensure there are no remaining leaks and the repair is successful. Pay close attention to the repaired area and any joints or connections.
Tips for successful repair
To ensure a successful duct boot repair, it’s essential to achieve a tight seal to prevent any future air leaks, which can compromise system efficiency and increase energy costs. Additionally, during the repair process, it’s beneficial to check for other ductwork issues, such as loose connections or additional damage, to address all potential problems in one go. These proactive steps can significantly enhance the effectiveness of the repair, improving the overall performance of your HVAC system and ensuring a healthier indoor environment.
- Missing Specifics: To further elaborate on the tips for successful repair, consider the following additions:
Ensure a tight seal
Achieving a tight seal is crucial for the longevity and efficiency of the repair. It prevents air from escaping, ensuring your HVAC system operates optimally and your energy bills stay low.
- Common Mistakes to Avoid: Not cleaning the surface properly before applying sealant or tape, leading to a weak bond and potential future leaks.
- Case Study: A homeowner reduced their monthly energy bill by 15% after ensuring all ductwork repairs, including duct boots, were sealed tightly, demonstrating the importance of meticulous sealing.
Check for other ductwork issues
While repairing a duct boot, it’s wise to inspect the rest of your ductwork for any signs of wear, damage, or loose connections. Addressing these issues simultaneously can enhance your system’s performance and indoor air quality.
- Effective Inspection Tips: Use a flashlight and a mirror to inspect hard-to-reach areas for any signs of damage or wear. Listen for any sounds of air escaping to identify leaks.
- Case Study: During a routine duct boot repair, a homeowner discovered and repaired additional minor leaks in the ductwork, ultimately improving the system’s efficiency by 20% and enhancing the home’s overall air quality.
Incorporating these specifics into the “Tips for successful repair” section will provide readers with actionable advice, common pitfalls to avoid, and real-world outcomes to motivate and guide their repair efforts effectively.
When to call a professional
While many duct boot repairs can be managed with a DIY approach, there are instances when it’s best to call in a professional. If the damage is extensive, involving large sections of ductwork or complex issues beyond simple sealing, a skilled technician’s expertise is necessary. Additionally, if problems persist after a DIY repair, it may indicate a deeper, less visible issue within your HVAC system that requires professional diagnosis and solutions.
In these situations, seeking professional help can save time, ensure a thorough repair, and prevent further complications.
Extensive damage
When duct boot damage is extensive, affecting large areas or involving significant structural issues, professional intervention is necessary to ensure a comprehensive and lasting repair.
If problems persist after DIY repair
If issues with your duct boot remain after a DIY attempt, it may indicate underlying problems within your HVAC system that require the expertise of a professional to diagnose and resolve effectively. Indicators or thresholds for extensive damage:
- Large cracks or holes that span several inches
- Significant rust or corrosion that compromises the structural integrity
- Damage that affects multiple components of the duct system
Questions to ask when hiring a professional:
- Experience and Certification: Are you licensed and certified to perform HVAC repairs?
- Assessment Process: How do you diagnose ductwork issues?
- Cost Estimate: Can you provide a detailed estimate of the repair costs?
- Warranty and Guarantees: Do you offer a warranty on your work?
- References: Can you provide references from past clients?
Finding a reputable HVAC professional:
Breathe Cleaner Aire FL in North East Florida can help you, just give us a call! But if you aren’t near us and need to get help:
- Check Reviews: Look for online reviews and ratings on trusted platforms.
- Ask for Recommendations: Seek referrals from friends, family, or local community groups.
- Verify Credentials: Ensure the technician is licensed, insured, and certified.
Compare Quotes: Get estimates from multiple providers to ensure fair pricing.


