- November 22, 2024
- in HVAC
- by Ross Taylor
Are you tired of dealing with a drafty room or skyrocketing energy bills due to a leaky duct boot? Fear not, as our comprehensive guide on Fixing Leaky Duct Boots is here to save the day! Duct boots play a pivotal role in your HVAC system, ensuring efficient air distribution throughout your space.
But when they start leaking, it’s a problem you can’t ignore. From identifying the telltale signs of a leak to step-by-step repair instructions, we’ve got you covered. Plus, we’ll share tips on preventing future leaks, keeping your home comfortable and your energy costs in check.
Get ready to tackle those leaky duct boots with confidence!
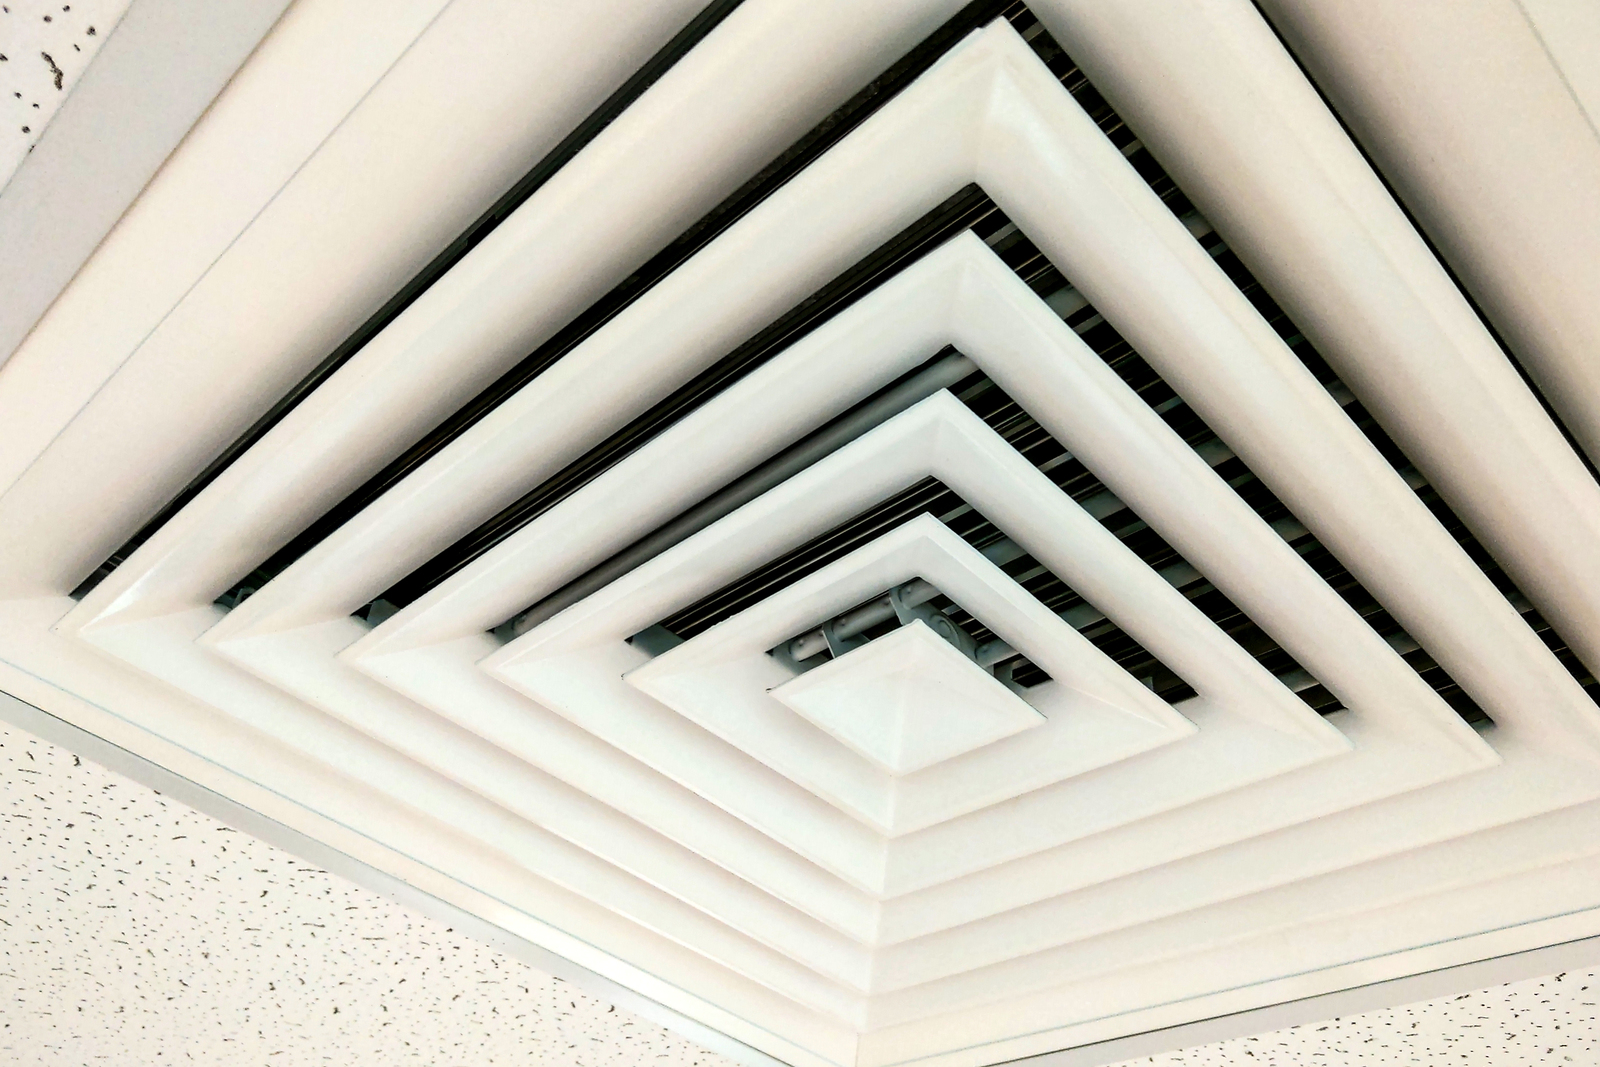
What is a Duct Boot?
A duct boot, integral to a building’s heating, ventilation, and air conditioning (HVAC) system, serves as a crucial junction point where the ductwork connects to the vents. Its primary function is to facilitate the smooth transition of air from the main ducts to the individual room vents, ensuring efficient air distribution throughout the structure. Typically crafted from metal, plastic, or fiberglass, duct boots are designed to fit snugly into floor, wall, or ceiling openings, acting as a bridge between the ducts and the room’s interior.
This component not only aids in directing airflow but also contributes to maintaining the system’s energy efficiency by minimizing air leakage. Understanding the role and importance of a duct boot is essential for anyone looking to ensure their HVAC system operates optimally, providing a comfortable indoor environment.
| Type of Duct Boot | Material | Common Uses | Benefits | Drawbacks |
| Floor | Galvanized Steel | Residential and commercial buildings | Durable, resists corrosion | Can be noisy when walked over |
| Wall | Aluminum | Residential and commercial buildings | Lightweight, rust-resistant | Less durable than steel |
| Ceiling | Plastic | Mainly residential | Easy to install, affordable | Not as heat resistant as metal |
| Fiberglass | Specialty applications | Insulates well, reduces noise | More expensive, can degrade over time |
Understanding the differences among these duct boots can help in selecting the right type for specific HVAC needs, ensuring efficient operation and longevity of the system.
What is a Duct Boot?
A duct boot, integral to a building’s heating, ventilation, and air conditioning (HVAC) system, serves as a crucial junction point where the ductwork connects to the vents. Its primary function is to facilitate the smooth transition of air from the main ducts to the individual room vents, ensuring efficient air distribution throughout the structure. Typically crafted from metal, plastic, or fiberglass, duct boots are designed to fit snugly into floor, wall, or ceiling openings, acting as a bridge between the ducts and the room’s interior.
This component not only aids in directing airflow but also contributes to maintaining the system’s energy efficiency by minimizing air leakage. Understanding the role and importance of a duct boot is essential for anyone looking to ensure their HVAC system operates optimally, providing a comfortable indoor environment.
Why Do Duct Boots Leak?
Duct boot leaks can stem from several common issues, each significantly impacting your home’s comfort and energy efficiency. Improper installation is a primary culprit, where duct boots are not correctly fitted, creating gaps through which air can escape. As time passes, age and wear take their toll on the duct boots, leading to the development of cracks and holes.
Furthermore, sealant failure, where the sealing material no longer retains its effectiveness, allows air to leak out. These problems not only compromise the efficiency of your HVAC system but also lead to increased energy costs and diminished air quality. Identifying and addressing the root causes of a leaky duct boot is essential for maintaining an optimal indoor environment.
Improper Installation
Improper installation is a significant factor leading to leaky duct boots. If the duct boot is not aligned correctly or securely fastened, gaps can emerge, allowing air to escape. This inefficiency not only undermines the performance of your HVAC system but also leads to increased energy bills.
| Common Installation Mistakes | Consequences | Prevention Tips |
| Not using the right size duct boot | Creates gaps, leading to air leaks | Measure the duct opening accurately before installation |
| Failing to secure the duct boot properly | Allows the boot to move or detach, causing leaks | Use appropriate fasteners and ensure a snug fit |
| Ignoring the importance of sealant | Compromises the airtight seal around the boot | Apply a high-quality sealant around the edges of the boot |
Age and Wear
Over time, age and wear take their toll on duct boots. Materials may deteriorate, resulting in cracks or holes that compromise the integrity of the ductwork. This gradual degradation impacts the system’s ability to efficiently manage airflow and temperature.
| Signs of Aging | Potential Impact | Maintenance Tips |
| Cracks and holes in the duct boot | Leads to air leaks, reducing HVAC efficiency | Regularly inspect duct boots for signs of wear and replace as necessary |
| Material degradation (e.g., rust on metal boots) | Weakens the duct boot structure, causing leaks | Choose materials suited to your environment and inspect for early signs of degradation |
Sealant Failure
Sealant failure is another common issue that can cause duct boots to leak. Exposure to fluctuating temperatures and humidity can cause the sealant to crack or peel, creating pathways for air leakage. Regular inspections and maintenance are essential to identify and address sealant failure in a timely manner.
| Type of Sealant | Expected Durability | Signs of Failure |
| Mastic | Long-lasting, but can deteriorate over time | Visible cracks or peeling |
| Foil Tape | Durable, yet may lose adhesion in extreme conditions | Edges lifting or tape detaching |
| Silicone Caulk | Resistant to temperature changes, but can shrink | Gaps forming between the sealant and duct boot |
By addressing these common causes of leaks with appropriate measures, homeowners can significantly improve the efficiency and longevity of their HVAC systems.
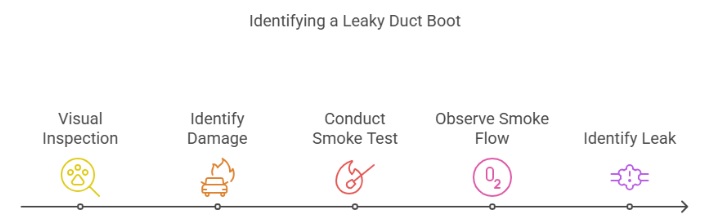
How to Identify a Leaky Duct Boot?
Identifying a leaky duct boot is crucial for maintaining the efficiency of your HVAC system. There are two primary methods: visual inspection and a smoke test. Begin by visually inspecting the duct boot for any obvious signs of gaps, cracks, or damage that could allow air to escape.
Common examples of damage include rust on metal boots, cracks in plastic or fiberglass boots, and other visible signs of deterioration. These indicators can often be a clear sign of potential leaks. For a more comprehensive assessment, conduct a smoke test.
Utilize a smoke stick, preferably one designed for HVAC diagnostics, and hold it near the duct boot. Observe the smoke’s flow; any disruption or irregular movement in the smoke indicates an airflow disruption caused by a leak. This method is particularly effective for identifying smaller leaks that might not be visible to the naked eye.
These straightforward techniques are effective in pinpointing leaks, ensuring your HVAC system operates at its best.
Visual Inspection for Gaps or Damage
Visual inspection serves as the initial step towards identifying a leaky duct boot. Carefully examine the duct boot for any gaps, cracks, or damage on its surface. Look for specific signs such as rust on metal boots or cracks in plastic or fiberglass materials.
These visible signs are key indicators of potential air escape points, directly impacting your HVAC system’s efficiency.
Smoke Test for Airflow Disruption
Performing a smoke test offers a more nuanced approach to detecting leaks. By utilizing a smoke stick, specifically designed for HVAC use, near the duct boot, watch the behavior of the smoke. Disruption or alteration in the smoke’s path indicates an airflow disruption caused by a leak.
This technique allows for the precise location of leaks, facilitating a more focused repair strategy.
Preparing to Fix a Leaky Duct Boot
Before tackling a leaky duct boot, it’s crucial to gather the necessary tools and ensure safety measures are in place. Begin by collecting essential items such as sealant, gloves, and a flashlight—key components for the repair process. Then, prioritize safety by turning off the HVAC system.
This step is vital to prevent any airflow that could disrupt the repair efforts. Proper preparation not only facilitates a smoother repair process but also ensures that the duct boot is effectively sealed and reconnected, maintaining the optimal efficiency of your HVAC system.
Gather Tools: Sealant, Gloves, Flashlight
Prior to commencing the repair, ensure you have all the necessary tools at your disposal. This includes sealant, crucial for effectively sealing any gaps or cracks, gloves to safeguard your hands throughout the repair process, and a flashlight to shed light on dark or difficult-to-reach areas around the duct boot. Equipping yourself with these tools is essential for a smooth and successful repair operation.
| Tool/Supply | Type/Specification | Purpose |
| Sealant | Heat-resistant mastic or silicone-based | To seal gaps and cracks effectively, ensuring a durable, airtight seal. |
| Gloves | Nitrile or heavy-duty work gloves | To protect hands from sharp edges and chemicals. |
| Flashlight | LED, high-lumen | To illuminate dark or tight spaces around the ductwork for better visibility. |
Ensure Safety: Turn Off HVAC System
Emphasizing safety is critical when addressing a leaky duct boot. An essential safety measure is to turn off the HVAC system. This step prevents airflow through the system, which could disperse dust or debris, thereby complicating the repair efforts.
Moreover, turning off the system minimizes the risk of injuries, creating a safer environment for the repair task at hand.
| Safety Step | Action | Purpose |
| Turn Off HVAC System | Locate and switch off the corresponding circuit breaker in the electrical panel. | To prevent airflow and ensure a safe working environment during the repair. |
Steps to Fix a Leaky Duct Boot
Repairing a leaky duct boot involves a structured approach to ensure the integrity and efficiency of your HVAC system. Begin by inspecting and cleaning the area around the boot, removing any debris or dust that could hinder the repair process. Next, apply sealant carefully to any discovered gaps or cracks, a critical step for establishing an airtight seal.
After the sealant, secure the boot firmly to the ductwork, ensuring it is tightly attached and unlikely to leak in the future. Lastly, test for leaks using either smoke or tissue paper to confirm the effectiveness of your repair. Adhering to these steps diligently will help maintain the optimal performance of your HVAC system and enhance indoor air quality and comfort.
Inspect and Clean the Area Around the Boot
Initially, take the time to inspect the area surrounding the duct boot meticulously for any visible damage or accumulation of debris. Cleaning this area is pivotal, as it prepares the surface for a secure application of sealant by removing any particles that might hinder adhesion. Suggested Cleaning Tools and Agents
| Tool/Agent | Use Case | Notes |
| Soft-bristled brush | Removing loose debris and dust | Gentle on duct surfaces, preventing scratches or damage. |
| Microfiber cloth | Wiping down the area | Effective for capturing dust without leaving residues. |
| Mild detergent | Cleaning stubborn grime or grease spots | Use in diluted form; ensure it’s rinsed and dried thoroughly. |
| Vacuum with a brush attachment | Removing dust from harder-to-reach areas | Ensures a thorough clean without direct contact that could cause damage. |
Apply Sealant to Gaps and Cracks
Following the inspection and cleaning, apply a high-quality sealant directly to any identified gaps or cracks. This step is crucial in establishing an airtight seal, effectively preventing air from leaking out and compromising the efficiency of your HVAC system. Sealant Application Guide
| Sealant Type | Application Method | Drying Time | Notes |
| Mastic Sealant | Apply with a brush or gloved fingers | 24-48 hours | Ideal for larger gaps; paintable once cured. |
| Silicone-based Sealant | Use a caulking gun for precise application | 12-24 hours | Flexible and waterproof; great for high-moisture areas. |
| Foil Tape | Press firmly along gaps or seams | Immediate | Best for straight duct sections; ensures a durable, metallic finish. |
| Butyl Rubber Tape | Wrap around the area, overlapping edges | Immediate | Excellent adhesion and waterproof properties. |
Secure the Boot Firmly to the Ductwork
With the sealant in place, it’s important to firmly secure the duct boot to the ductwork. This may require tightening existing screws or adding new fasteners to ensure that the boot remains in position, providing a durable and long-lasting seal. Fastener Selection Guide
| Fastener Type | Use Case | Notes |
| Self-tapping screws | Metal ductwork | Penetrates without pre-drilling; ensures a tight fit. |
| Clamps | Flexible ducts | Adjustable for a snug fit; prevents damage to duct material. |
| Aluminum tape | Sealing joints between boot and duct | Provides an additional layer of sealing; reflective properties. |
Test for Leaks with Smoke or Tissue Paper
Conclude the repair process by testing for leaks using either smoke or tissue paper. This simple yet effective method allows for the visual confirmation of the repair’s success, ensuring that air is no longer escaping and that your HVAC system is operating at its peak efficiency. Leak Testing Guide
| Testing Method | Procedure | Notes |
| Smoke Test | Hold a smoke pencil or incense stick near the repaired area. | Observe the smoke’s movement; steady smoke indicates no leaks. |
| Tissue Paper Test | Hold a piece of tissue paper near the duct boot. | Watch for movement; if the tissue flutters, there may be a leak. |
Preventing Future Leaks
To safeguard your HVAC system against future leaks, adopting a proactive maintenance strategy is key. Regular maintenance checks, ideally conducted every 6 months, are crucial for the early detection and prevention of potential issues. Furthermore, an annual professional inspection offers a deeper dive, uncovering any hidden problems that might not be immediately visible.
Implementing these practices ensures the longevity and efficiency of your HVAC system, maintaining a comfortable indoor environment and keeping energy costs under control.
Regular Maintenance Checks Every 6 Months
Regular maintenance checks every 6 months are critical for early detection and resolution of potential issues within your HVAC system. This preventative measure not only helps in maintaining the system’s efficiency but also plays a significant role in preventing leaks, ensuring the system operates smoothly and extends its operational lifespan.
| Checklist Item | Description | Why It’s Important |
| Inspect duct boots for damage | Look for cracks, gaps, or signs of wear | Early detection of potential leak sources |
| Check sealant and tape integrity | Ensure sealants and tapes are not peeling or cracked | Prevents air leaks by maintaining airtight seals |
| Verify duct boot attachment | Confirm duct boots are securely fastened to the ductwork | Prevents dislodgement and leaks |
| Look for rust or corrosion | Inspect metal components for signs of deterioration | Rust can lead to holes and leaks in the system |
| Assess insulation condition | Check if insulation is intact and properly placed | Ensures energy efficiency and prevents condensation |
Professional Inspection Annually
An annual professional inspection is key to a thorough health check of your HVAC system. Experts are equipped to identify and address any hidden problems, providing insights and actions to prevent future leaks. This detailed examination ensures your system remains in peak condition, optimizing performance and preventing costly repairs down the line.
| Inspection Focus | Description | Why It’s Important |
| Comprehensive system evaluation | A full assessment of the HVAC system’s condition | Identifies issues not visible to the untrained eye |
| Ductwork pressure test | Measures the pressure within ducts to detect leaks | Precisely locates leaks, even those not visible |
| Ventilation efficiency check | Evaluates the airflow and efficiency of the system | Ensures the system is operating at peak efficiency |
| Professional sealant application | Experts may apply industrial-grade sealants where necessary | Provides a more durable solution to prevent leaks |
| Certification and qualifications review | Ensure the professional has up-to-date certifications | Guarantees the inspector is knowledgeable and trustworthy |
Incorporating these detailed tables into the Preventing Future Leaks section provides readers with a comprehensive guide to maintaining their HVAC system, thereby preventing leaks and ensuring efficient operation.


